|
| Gourd
Cleaning |
|  Cleaning exterior Cleaning exterior
|
| Cleaning
the exterior and interior of gourds can be, and usually is, a tedious
task. The hard, outer shell is covered by a very thin skin that
must be removed unless the gourd is to be painted. In that case,
I suppose a dry gourd could be lightly sanded with fine sandpaper
and let it go at that.
I don't paint any of my work, so I have to remove
the outer skin in one of several ways.
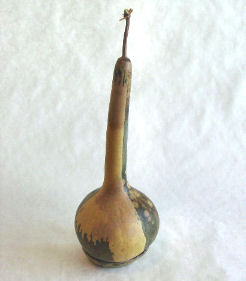
You can scrape off the skin right after the
gourd is harvested. This is called green cleaning. I use a leather-working
knife which is about the size of a paring knife and has a very rigid,
short blade and a wooden handle. Having the blade semi-sharp works
best for me. I work with the green gourd on a couple of wooden slats
on the rim of a large plastic garbage can filled with water and
a little dish washing soap. The water allows me to soak the gourd
for a while and to rinse it while I'm scraping. It doesn't take
long to get the feel of the blade as you slice away the green or
white skin. After the gourd is green cleaned, it must be put aside
to dry. I hang gourds in the rafters of my work shop for the winter.
Green cleaning seems to shorten the drying time significantly. |
 |
| |
|  Dry cleaning Dry cleaning
|
Another method is to scrape away
the outer skin in the spring after the gourds have dried. To do
this, it helps to soak the gourds for an hour or so. I use the same
knife and the same garbage can full of water. A brass scouring pad
is a useful addition to the process. Remember to keep it wet - it
is an effective tool.
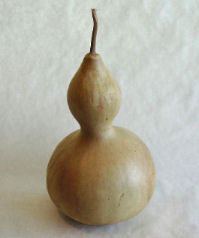
I discovered last winter that the best time
to clean the exterior of gourds is when they are frozen. All of
my gourds, whether they are drying in my old chicken coop or on
pallets outside, freeze in January and February. The outer skin
on a frozen gourd peels away in big chunks using the same knife
as above and, of course, no water. They will still mold. |
 |
| |
|  M is for Mold M is for Mold
|
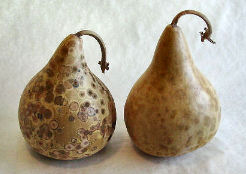
Mold is good! Whether they have
been green cleaned, freeze cleaned or not cleaned, all gourds will
mold while drying. The mold leaves some beautiful designs on the
gourd's hard shell which results in an interesting mottled appearance.
When it is time to create a work of art from your gourd, the mold
can be easily removed with that dandy brass scouring pad and water.
If you want a dried gourd with no mottled appearance
and a uniform palomino color, green clean it and while it is drying,
spray it occasionally with a diluted bleach solution to prevent
the mold from growing. |
 |
| |
|  Cleaning interior Cleaning interior
|
| The first
and most important thing to remember is that gourd dust, includung
mold dust, is BAD! VERY BAD!
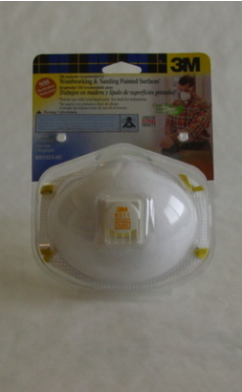
I recommend that anyone who intends to cut open
a dried gourd and start cleaning it out wear a dust mask. Buy a
good mask that will fit your face. Not one of those 98 cent ones
that are displayed near the paint. If you breathe a lot of the gourd
dust you will be coughing, wheezing and clearing your throat for
days. No telling what continual breathing of that stuff would do
to your respiratory system.
It's a great help to have the gourd you are
working on resting on a pillow. This allows you to hold the gourd
securely at any angle. I use an old pillow from some long forgotten
couch.
Cutting a gourd open can be done using several
types of saws. A coping saw or hack saw works well for small gourds.
I have a band saw with about a 7" throat on it which will lop
off the top of small to medium sized gourds very neatly. This is
a bit dangerous since you are moving the gourd across the blade
very quickly and holding the gourd in an unstable position. For
large gourds I use a mini electric jig saw. This little saw has
a very thin blade and easily cuts straight or curved lines that
are penciled on the gourd. This is the perfect saw if the top you're
cutting off is going to serve as the lid on your finished work of
art. To get the saw blade through the shell of the gourd before
starting the cut, I drill two 1/16th" holes very close to each
other on the pencil line. This allows me to force the saw blade
into the gourd before pressing the ON button. A little plastic wood
hides any evidence of the tiny holes I drilled.
|
 |
| |
|  What's in there What's in there
|
Gourds are full of pithy fiber
and seeds like a pumpkin. I use various types of homemade scrapers
to remove the bulk of this dry material. One of my most useful tools
is a small wire buffing wheel attached to a drill bit extender with
a wooden handle..I use this to remove, by hand, the remaining fiber
that clings to the inside after scraping. I have found that using
a wire wheel on an electric drill inside of a gourd can be dangerous.
That wire wheel, spinning at high speed, can grab that gourd right
out of your hands.
A gourd pot with a small neck, i.e. one to two
inches, presents a different cleaning problem. You need a narrow
scraper to get down in there. How about a table knife bent ninety
degrees at the end and sharpened with a grinder? That works for
me. To remove as much of the remaining pith as possible down in
there where you can barely see, I use the time honored "agate
swirl" technique. First I dump a handful of sharp edged agate
chips into the gourd. Then I grasp it by the neck and swirl the
chips around at high speed for several minutes. After that, I dump
the chips and fiber out into a flat pan and blow away the fiber
with an air hose. I dump the chips back into the gourd and repeat
the procedure until the inside is as clean as I want it. If you
don't have a mountain of agate nearby as we do, try using a handful
of roofing nails. These take a little longer, but they work. |
 |
| |
Copyright
© 2005-2006 by R E Ridges | Grand Gourds | Ann Gordon, Webmaster
|
|
